The hubster and I just purchased our first home and we are in the throws of "making it our own". We've painted- still not quite done. That darn master bedroom is still laughing at me. A couple weeks ago the hubster was put to task on a honey-do list because I had a vision. A vision that had to happen. Soon. My obsession, er, inspiration came from this blog post by This Nest is Blessed. So my sweet, trusting, and handy hubster manned up to help make my vision come to life! Gosh I love him :-)
Actually, it was a really simple project- and really affordable! This project took about a day and a half- an evening to stain wood and an afternoon to mount the wood on the wall. After calculating what the damage would be, not only time-wise but cost, this project was a no brainer! Materials totaled to about $40 and it looks like a million dollar wall! Well, maybe not million, but a couple hundred at least. I wanted something special. Something custom. Enter the hubster!
 |
| My hubster, Matt. He's swell :-) |
We started by purchasing the wood from Lowe's. It was less than $11. Um, can you say cheap?! Each package had 6 pieces of 8 ft. pine planks and for our surface, two packages were plenty.
Matt started by cutting the pieces down to the right size- for us it was a little over 7 ft.
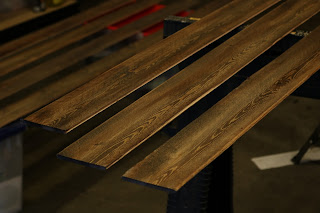
After cutting the planks down to size, we used two different Minwax stains, espresso & grey. I wanted a bit of aged look to the boards and the combo of these two stains did the trick!
Now for the fun part! Using finishing nails so the heads wouldn't be seen, we started tacking them to the wall. The boards are super light so we weren't too concerned with finding the studs but if you are concerned, you can find studs to nail into.
As you can see, the recessed cable and power box had to be worked around. Since we were going to put the TV on the wall we didn't worry about bringing the wood right up to the edge. If we hadn't made plans for the TV we could have notched out the wood make it flush against the edge but this saved us time!
By the time we got to the bottom there was about an inch left of the wall to cover. We had one piece of wood left but because we measured wrong on a previous plank (oops!) we cut it in half and pieced three strips together to get a perfect fit. The planks were thin enough that Matt was able to cut it down to size with a straight edge and a utility knife. We puzzled it all together quite nicely and since it's at the bottom, no one will ever notice. :-)
And now the finished wall...
Tada! Gorgeous! And the wall ain't bad either ;-)
 |
| I'm in love! |
Now on to the the TV mounting... AKA the real reason Matt was so keen on re-doing the wall. Yes, the truth comes out. His doubt about the project was greatly lessened by the promise of a new TV. Boys and their toys!
A little measuring here and there, find those studs, and voilà!
 |
I love the way this turned out! The wood is just aged enough to warm up the room. |
Custom wall? CHECK!
A few fall decorations and it's done!
Now to tackle that master bedroom...


Wow, beautiful! Way to go, Lindsay and Matt!
ReplyDeleteThanks Carol! We had fun with this project!
Delete